Showing posts with label thrifting. Show all posts

June 1, 2012

Quick Fix: Simple way to cover a logo on thrifted clothes!


 WHAT YOU WILL NEED:
-A ruler or cutting mat with measurements on it 
-A rotary cutter, or scissors
-Fabric glue (Michaels, $6.99)
-A fabric of your choice 
(I'm using a piece I cut off a pair of jeans from Salvation Army)

Step One:

Cut out a small piece of fabric.
 Align the sides to be sure they are all straight. 
 I'm cutting mine into a typical pocket shape so I'm using the 45 degree angle lines on my cutting mat to help me align my cuts. 

 Step Two:

Place the patch on the shirt where you want it and make sure it fits and covers what you want.
Make sure its straight! 

Step Three:

Start Gluing! 
 I recommend starting in the center and working your way out to ensure optimum fabric fusion.
This also helps to prevent excess glue seeping out the sides. 

When you've finished gluing let the fabric sit for 2 to 3 hours or until dry!  
Also, when you're gluing make sure the fabric is on a cleanable surface. There is a higher chance of the glue seeping through thinner fabrics so always be cautious. 

Denim Shirt- $2.99- Goodwill
Dark wash high waisted shorts- $29.95- Cotton On

Thanks for reading, more posts soon!
:)

April 24, 2012

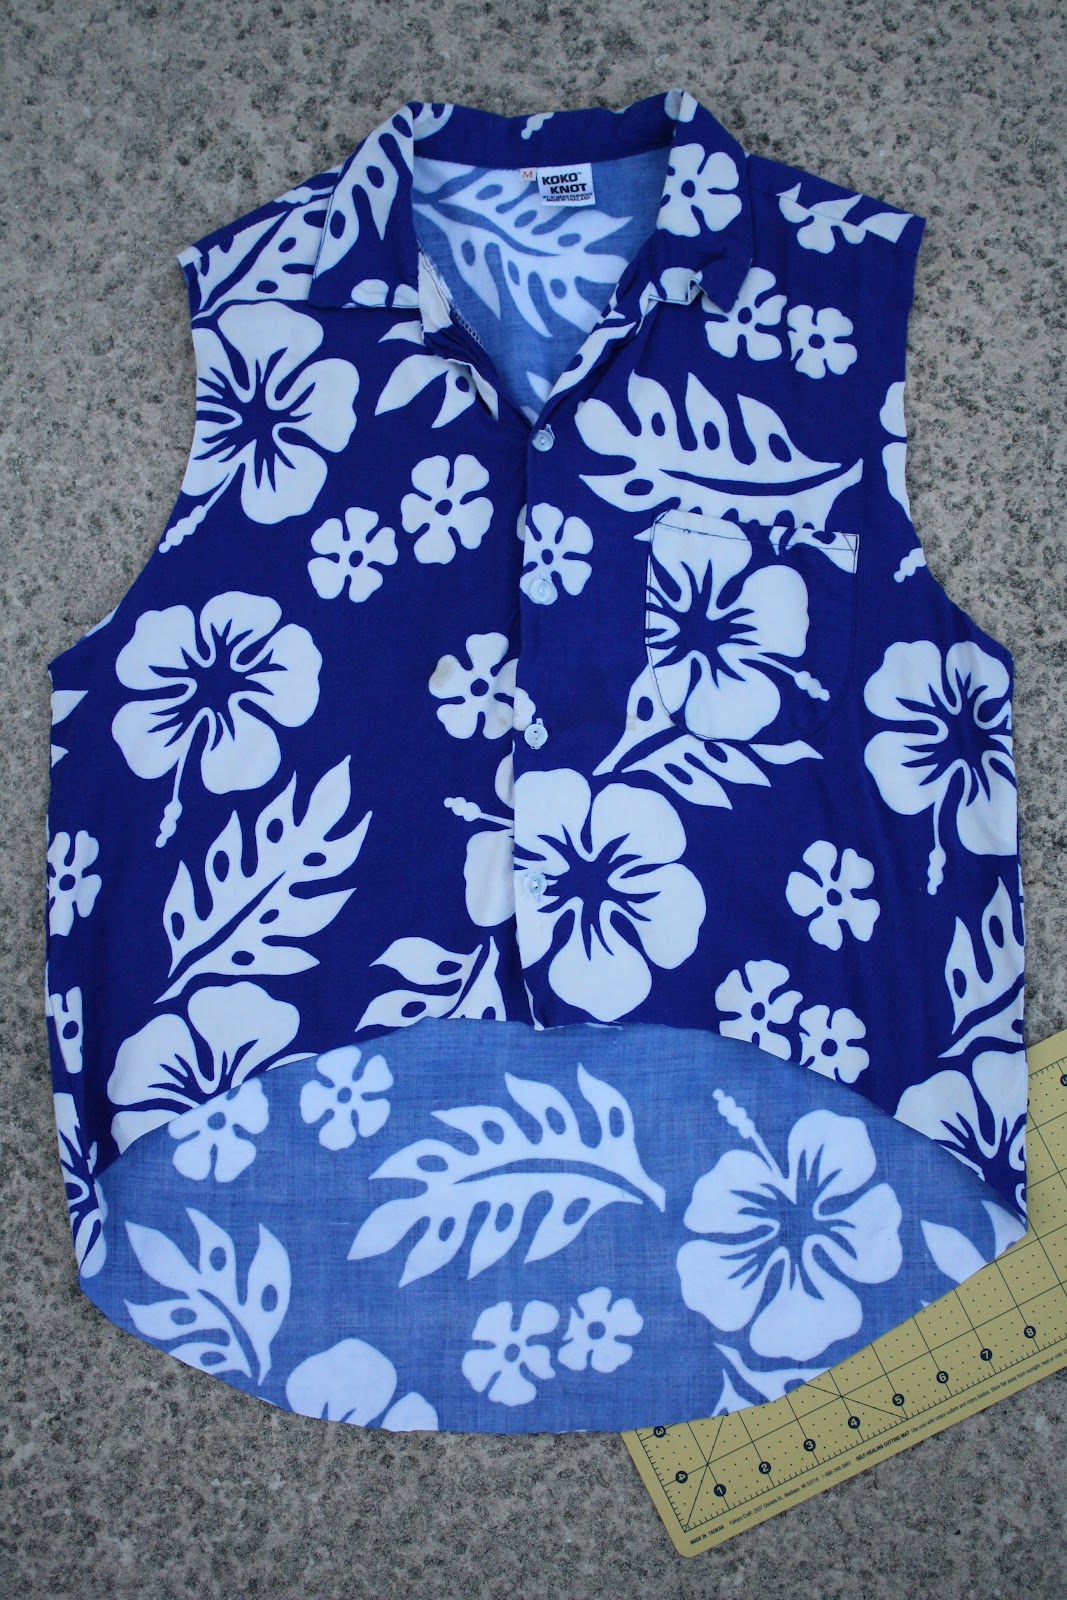
DIY: Transform a Mens Button Up into a Sleeveless "High-Low" Shirt!


 WHAT YOU WILL NEED:
-Scissors/rotary cutter

 STEP ONE

Smooth out the shirt and make sure the seems on the sleeves are aligned. Based on personal preference you can cut just behind the seem or just in front of it. 

After you cut one sleeve cut the other. You can line up the material to make sure you cut it in the same place if you want. 

It should look like this!

 STEP TWO

Now we're going to change the long straight hem into a high-low hem which makes it shorter in the front and longer in the back. 
First choose how long you want the shirt in the front, I'm cutting mine right above the last button. Then cut straight across a couple of inches and begin to angle your cut downwards as you reach the side seem of the shirt. 

After you reach the side seem cut straight down the seem to detach that piece of fabric. 

Turn the fabric over and line it up on the other side and cut along the edge of the fabric to ensure an even cut on both sides. 

Once that's done it should look like this. 

I went ahead and cut the hem off at this point. 
Next just continue cutting at an angle until you reach the edge of the fabric, it should make kind of an oval shape. 


when you finish one side, line the side seems of the shirt up so you can cut along the first edge to make it even. 

It should look something like this!

Shirt: Local Thrift Store: $1.99
Time spent: ~10 mins

*Not all high low hems will end up looking as drastic as this one, the shirt was pretty big on me and I have a pretty short torso so naturally, I cut mine shorter in the front. Just don't be discouraged if yours doesn't look exactly like my pictures! 
Also, you can use this technique on any button up shirt! I've done this to one of my dads old dress shirts, its pretty big but it still worked fine.*

Also a huge thank you to all my new followers!!! I really appreciate you all taking the time to look at my blog, please leave me a comment if there's anything specific you'd like to see from me!
More D.I.Y's to come! Thanks so much!
:)

April 12, 2012

DIY Simple Shorts!


In this tutorial I will be showing you how to turn some tacky pants from a thrift store into cute high waisted shorts! 


Lets get started!

WHAT YOU'LL NEED:

Step one:

Put the pants on and make a mark a little lower than how long you want them to be. Remember: you can always make them shorter, but you can't make them longer!

Step two:

Next, lay the pants out on a flat surface. If you're using a rotary cutter remember to put something under the material so you don't cut your table!
Find the mark or cut you made where you want to cut the material. I would recommend using a straight edge to mark all the way across the material so you get a straight cut but since my pattern goes straight across i was able to use the lines of stars as a guideline. 
And cut!

Step 3:


Fold the pants in half along the seem and make sure the side seems line up. Make a mark where the material ends, and cut across!

Tada! Shorts!

Now, put the shorts on and make sure they are the length you want. If you want to trim them more, remark and cut them just like in the previous steps. 

Step 4:

 Now these shorts are a little too plain for me. If you want to hem them and keep them plain, you're done! If you want to add a little more, keep reading!
Turn the shorts inside-out

Line up the lace on the inside of the leg and pin all the way around

When you've pinned the lace around the leg it should look something like this. once you have it pinned, use a strong thread and straight stitch when you put the pins. Remember to add extra stitches on the seems and where the two ends of the lace meet for extra strength. 

After both legs are sewn on it should look like this! Turn them right side out and they're ready to be worn! 


How I wear them:
top-Nordstrom Rack
shoes-H&M-$13
shorts-Salvation Army-$1.99
lace trim-Hobby Lobby-$1.99/yd

Total time spent:~2 1/2 hrs
(hand sewn)

Total cost: $5!


So, as you can see, this is my first post on this blog! Thank you for reading and please take a second to leave a comment on this post and let me know what you think! I know my pictures probably aren't the best but I will get the hang of it soon. I have many future posts planned out so if my blog seems interesting to you I would really appreciate it if you followed me! 
Also, please don't hesitate to give me any suggestions of things you would like me to post about. It can be as broad as "T-shirt reconstruction" or as specific as sending me a picture and telling me how to make the shirt the person is wearing. 

Thanks for reading!